
Moon Salutation, or Chandra Namaskar, is a graceful sequence of yoga poses that honors the soothing, cooling, and reflective energy of the moon. Where the Sun Salutation (Surya Namaskar) energizes and heats the system, Chandra Namaskar cools and restores, making it an ideal practice for the evening to promote relaxation and emotional balance.
This beautiful flow awakens the ida nadi—the lunar energy channel governing calmness and intuition. This guide will walk you through its spiritual significance, key benefits, and each of the 14 steps in the sequence.
What's in this Guide:
Sun vs. Moon Salutation: A Quick Comparison
While the two sequences complement each other perfectly, they embrace different qualities:
| Feature | Surya Namaskar (Sun) | Chandra Namaskar (Moon) |
|---|---|---|
| Energy | Solar – Active, Heating, Yang | Lunar – Cooling, Calming, Yin |
| Best Time | Morning | Evening or Night |
| Focus | Vitality, Strength | Balance, Intuition |
| Chakras | Solar Plexus (Manipura) | Throat (Vishuddhi) |
Benefits of Practicing Moon Salutation
Regular practice brings harmony to your body, emotions, and energy system.
Physical Benefits
- Improves flexibility, balance, and joint mobility.
- Strengthens the legs, spine, and core muscles.
- Promotes relaxation and can lead to better sleep.
Mental & Spiritual Benefits
- Calms the nervous system and reduces anxiety.
- Balances masculine (solar) and feminine (lunar) energies.
- Enhances meditation, intuition, and introspective awareness.
The 14 Steps of Chandra Namaskar
A full cycle consists of two half-rounds. Below are the steps for the first half, leading with the right leg.
Step 1: Pranamasana (Prayer Pose)
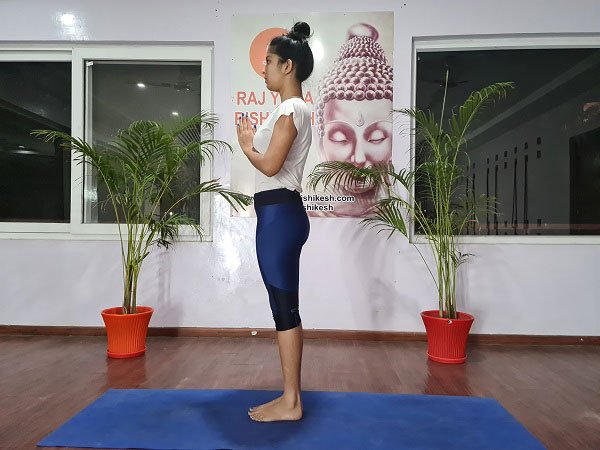
(Exhale): Stand upright with feet together. Place palms together in front of your chest and relax the whole body.
Step 2: Hasta Uttanasana (Raised Arms Pose)
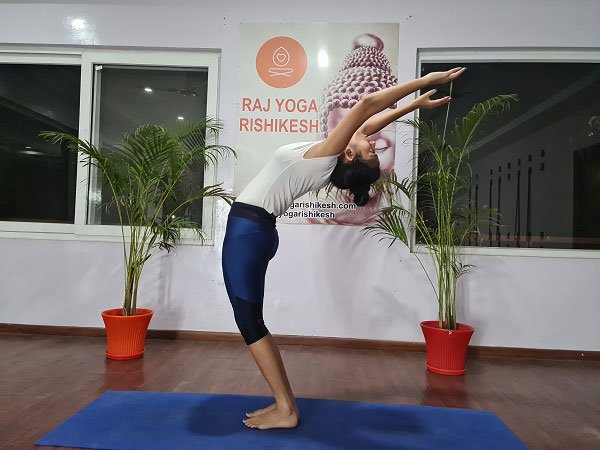
(Inhale): Raise both arms up and back, keeping them shoulder-width apart. Gently bend your arms, head, and torso backward.
Step 3: Padahastasana (Hand to Foot Pose)

(Exhale): Bend forward from the hips, keeping the spine straight. Bring your palms or fingertips to the mat. Bend your knees if needed.
Step 4: Ashwa Sanchalanasana (Equestrian Pose)
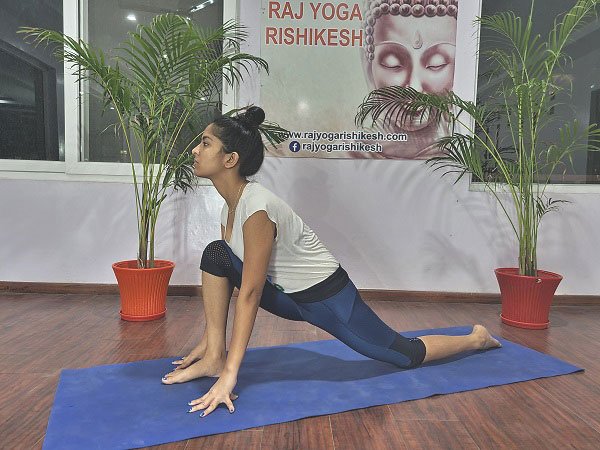
(Inhale): Stretch your right leg back as far as you can. Bend your left knee, ensuring it is stacked directly above your ankle. Look forward.
Step 5: Ardha Chandrasana (Half-Moon Pose)
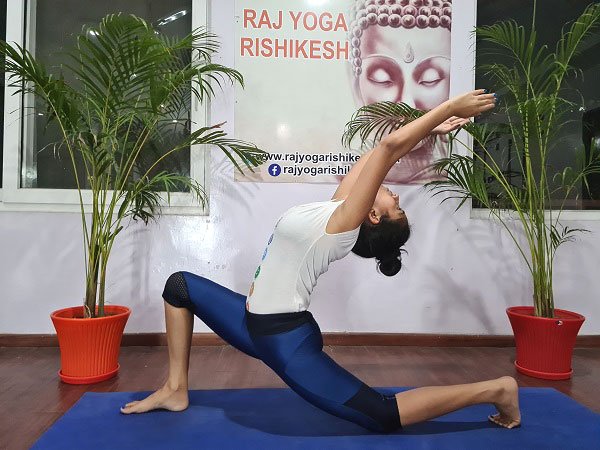
(Inhale): From the lunge, raise your arms up and stretch over the head. Arch the back and look up, creating a gentle curve from your fingertips to your back toes that resembles a crescent moon.
Step 6: Dandasana (Plank Pose)

(Retain Breath): Bring your palms back to the floor and step your left foot back to meet the right, creating a straight line from head to heels.
Step 7: Ashtanga Namaskara (Eight-Limbed Salute)
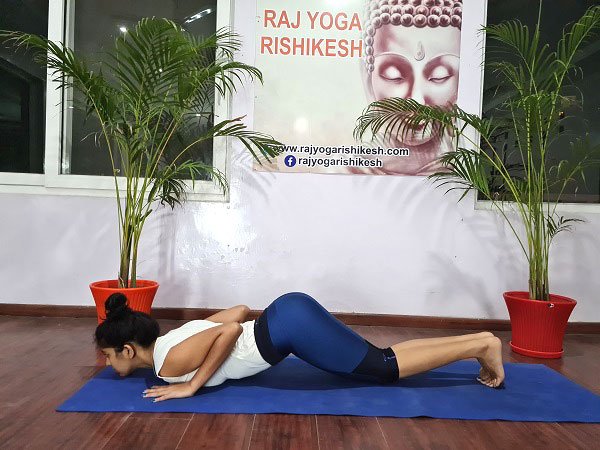
(Exhale): Gently lower your knees, chest, and chin to the mat, keeping your hips raised.
Step 8: Bhujangasana (Cobra Pose)
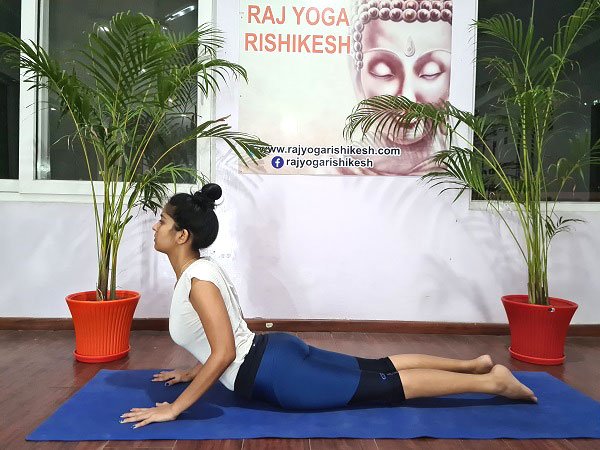
(Inhale): Slide your chest forward and up into a gentle backbend, keeping your hips on the floor.
Step 9: Parvatasana (Mountain Pose)

(Exhale): Lift your hips high into an inverted 'V' shape.
Step 10: Ashwa Sanchalanasana (Equestrian Pose)
(Inhale): Step your right foot forward between your hands and lower your left knee, returning to the lunge.
Step 11: Ardha Chandrasana (Half-Moon Pose)
(Inhale): Lift your torso and arms, arching back into the crescent moon shape on the second side.
Step 12: Padahastasana (Hand to Foot Pose)
(Exhale): Step your left foot forward to meet the right and return to the forward fold.
Step 13: Hasta Uttanasana (Raised Arms Pose)
(Inhale): Unroll your spine, reach your arms up, and gently arch back.
Step 14: Pranamasana (Prayer Pose)
(Exhale): Bring your palms back together in front of your chest.
This completes a half-round. To complete a full round, repeat the entire 14-step sequence, this time leading with your left leg in Steps 4 and 10.
Watch the Full Sequence
Tips for Your Practice
- Practice in the evening or under moonlight for a deeper connection.
- Move slowly and mindfully with long, calm breaths.
- Avoid this practice during menstruation, pregnancy, or if you have high blood pressure.
- Begin with 3–5 rounds, gradually increasing as your stamina improves.
- Practice with gratitude, visualizing the moon’s gentle light calming your mind and heart.
About the Author: Yogi Sandeep
Born in Rishikesh into a traditional family where the Vedic tradition has been a way of life for generations, Yogi Sandeep is the founder of Raj Yoga Rishikesh. He is an E-RYT 500 Teacher, holds a Master's degree in Yoga, and has over a decade of teaching experience.
Moon Salutation FAQs
Can beginners do Chandra Namaskar?
Yes. The key for beginners is to move slowly, focusing on breath and proper alignment rather than speed. Using props like blocks under the hands can also be very helpful.
How many rounds should I do?
Start with 2 to 4 full rounds (one round includes leading with the right leg, then the left). As you become more comfortable, you can increase the number, but the focus should remain on the quality of movement.
Can Moon Salutation help with stress and anxiety?
Absolutely. The slow, rhythmic pace and deep breathing are specifically designed to activate the body's parasympathetic nervous system, which promotes a state of "rest and digest," effectively calming the mind and reducing anxiety.
Experience the Balance
Explore the harmony between solar and lunar energies. Learn to master both Sun and Moon Salutations in our authentic 200-Hour Yoga Teacher Training in Rishikesh.
Learn About Our Training →