
Sun Salutation, or Surya Namaskar, is one of the most fundamental and complete practices in yoga. This graceful sequence of 12 postures is a salute to the sun, which symbolizes spiritual consciousness. When performed rhythmically, it connects the body, breath, and mind, reflecting the rhythms of the universe itself.
Considered a full-body exercise, it's the perfect way to warm up before other asanas, stretch and tone all your joints and muscles, and expand your awareness. This guide will break down each of the 12 steps, making it easy for anyone to begin this powerful practice.
What's in this Guide:
Key Benefits of Sun Salutation
Practicing Surya Namaskar regularly offers numerous benefits for your physical and mental well-being:
- Full-Body Workout: It's a fantastic cardiovascular exercise that stretches, massages, and tones all the joints, muscles, and internal organs.
- Improves Circulation: Better blood flow can lead to glowing skin and nourish the scalp, helping to prevent hair loss.
- Boosts Metabolism: The sequence stimulates the digestive system and helps balance metabolism, which can aid in weight management.
- Reduces Stress & Anxiety: The rhythmic connection of breath and movement has a profound calming effect on the mind.
- Activates the Solar Plexus: This practice stimulates the *Manipura Chakra* (navel center), believed to be a source of creativity, intuition, and personal power.
The 12 Steps of Surya Namaskar
A full cycle of Surya Namaskar consists of two rounds: one leading with the right leg, and one leading with the left. Here is a step-by-step breakdown of the first half-round.
Step 1: Pranamasana (Prayer Pose)
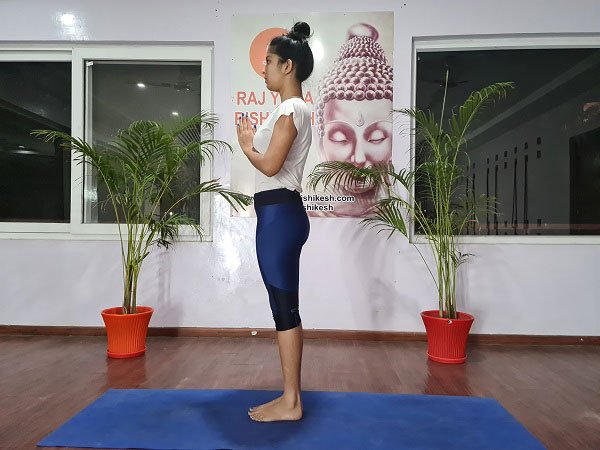
- How to do it (Exhale): Stand upright with feet together. Place your palms together in a prayer position (*namaskar mudra*) in front of your chest and relax the whole body.
- Beginner's Tip: If you have lower back pain, keep your feet hip-width apart.
Step 2: Hasta Uttanasana (Raised Arms Pose)
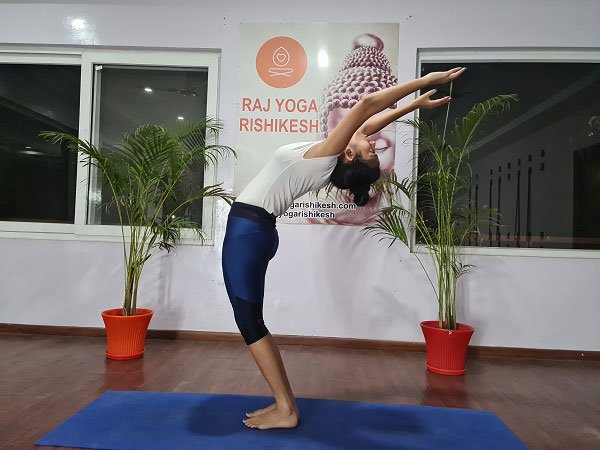
- How to do it (Inhale): Raise both arms up and back, keeping them shoulder-width apart. Gently bend your arms, head, and torso backward.
- Beginner's Tip: If you have back pain, avoid the backbend. Simply raise your arms straight up.
Step 3: Padahastasana (Hand to Foot Pose)

- How to do it (Exhale): Bend forward from the hips, keeping the spine straight. Bring your palms or fingertips to the mat on either side of your feet. Bring your forehead toward your knees without straining.
- Beginner's Tip: It's okay to bend your knees! If you can't reach the floor, rest your hands on your shins or ankles.
Step 4: Ashwa Sanchalanasana (Equestrian Pose)
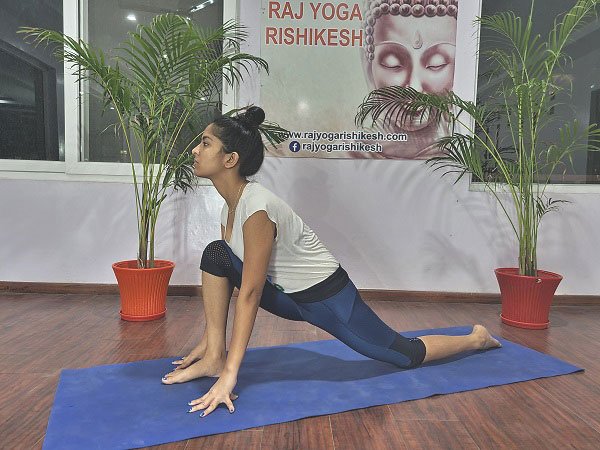
- How to do it (Inhale): Stretch your right leg back as far as you can. Bend your left knee, ensuring it is stacked directly above your ankle. Look forward or arch back slightly.
- Beginner's Tip: For more support, keep your back knee on the floor.
Step 5: Dandasana (Plank Pose)

- How to do it (Retain Breath): Step your left foot back to meet the right, creating a straight line from your head to your heels. Your wrists should be directly under your shoulders.
- Beginner's Tip: Engage your core to prevent your hips from sagging or rising too high.
Step 6: Ashtanga Namaskara (Eight-Limbed Salute)
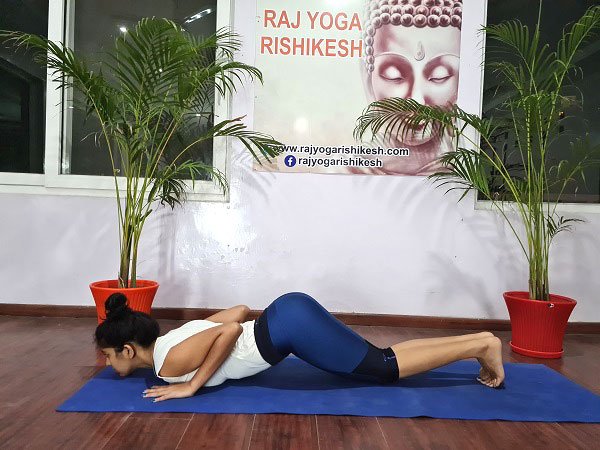
- How to do it (Exhale): Gently lower your knees, chest, and chin to the mat. Keep your hips raised off the floor and elbows tucked in close to your body.
- Beginner's Tip: Lower your knees first, then your chest and chin.
Step 7: Bhujangasana (Cobra Pose)
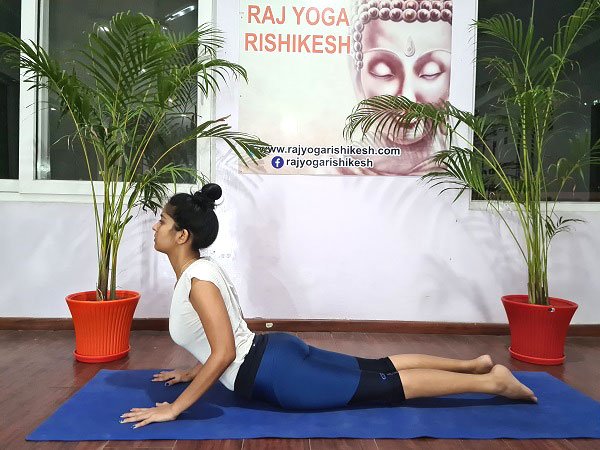
- How to do it (Inhale): Slide your chest forward and up, keeping your hips on the floor. Keep your elbows slightly bent and shoulders relaxed away from your ears.
- Beginner's Tip: Don't tilt your head back if you have neck issues. Look straight ahead instead.
Step 8: Parvatasana (Mountain Pose)

- How to do it (Exhale): Lift your hips and tailbone high, creating an inverted 'V' shape. Gently press your heels towards the mat, keeping your arms and legs straight.
- Beginner's Tip: Keep your knees bent to help lengthen your spine if your hamstrings feel tight.
Step 9: Ashwa Sanchalanasana (Equestrian Pose)
- How to do it (Inhale): Step your right foot forward between your hands (the same leg that went back first). Lower your left knee to the floor and look forward.
Step 10: Padahastasana (Hand to Foot Pose)
(Exhale): Step your left foot forward to meet the right and return to the forward fold, as in Step 3.
Step 11: Hasta Uttanasana (Raised Arms Pose)
(Inhale): Unroll your spine, reach your arms up, and gently arch back, as in Step 2.
Step 12: Pranamasana (Prayer Pose)
(Exhale): Bring your palms back together in front of your chest, returning to the starting position of Step 1.
This completes a half-round. To complete a full round, repeat the entire 12-step sequence, this time leading with your left leg in Steps 4 and 9.
Watch the Full Sequence
About the Author: Yogi Sandeep
Born in Rishikesh into a traditional family where the Vedic tradition has been a way of life for generations, Yogi Sandeep is the founder of Raj Yoga Rishikesh. He is an E-RYT 500 Teacher, holds a Master's degree in Yoga, and has over a decade of teaching experience.
Surya Namaskar FAQs
Can Surya Namaskar reduce belly fat?
Yes. As an intensive, full-body exercise, practicing Sun Salutations consistently can help you lose weight, tone your core, and stay in shape.
What are the main precautions for Sun Salutation?
Avoid this practice if you have a fever, hernia, high blood pressure, or major back conditions like a slipped disc. It's also recommended to avoid it during menstruation. Always consult a doctor if you have any major health concerns.
How many rounds should a beginner do?
Start with 2 to 4 full rounds (one round includes leading with the right leg, then the left). As your stamina builds, you can gradually increase the number.
Ready to Go Deeper?
Sun Salutation is a cornerstone of authentic yoga practice. Learn to master this sequence and much more with expert guidance in our 200-Hour Yoga Teacher Training in Rishikesh.
Explore Our Teacher Training →